By: Amiware Inc.
 Welcome to Veezel VV, a fully responsive, user friendly and full featured software to manage customers, follow up orders, schedule visits, manage tasks, communication and more; as part of the Veezel Suite.
Our suite allows users to easily integrate any existing process and add every new one accourding to new requirements. It supports four languages: English, Spanish, French and Creole. More languages can be added as needed.
This documentation is targetted to explain the installation and guide to use this application.
In order to install this application, user device must meet the following requirements:
User has to follow the steps below to install this application:
Install the application and follow the on-screen instructions.
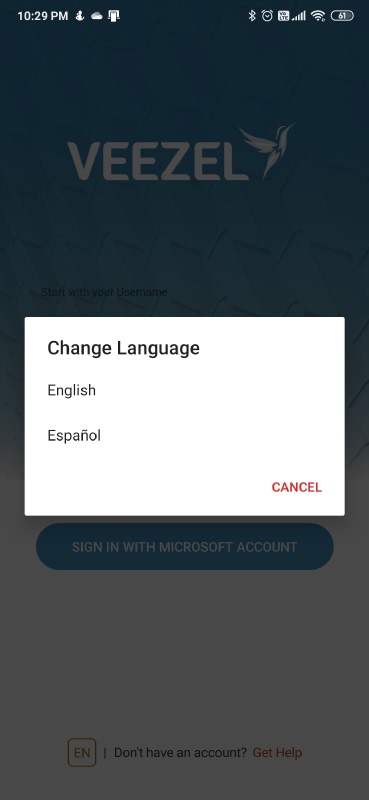
Veezel VV uses system's default localization and allow user to select any language available.
After accessing the Veezel VV application, user will be automatically redirected to the login view. Users are able to login by typing their usernames or email and password. Login form is displayed below:
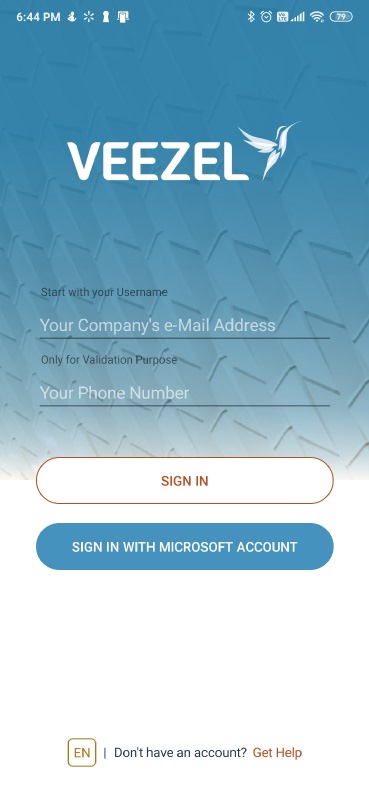
User must be registered in advance with the company, in order to use this mobile application. For any questions about this process, please contact the company.
After successful registration, an email will be sent to the registered email address to authenticate the user. Click the "Confirm Now" button in the email and activate your account.
In case that some users forgot their password, they will be able to reset it from Forgot Password form available, after clicking Forgot your password? link on login page.
To retrieve the password, provide the email address used at the time of registration. Once the email is confirmed, password will be sent at the registered email address.
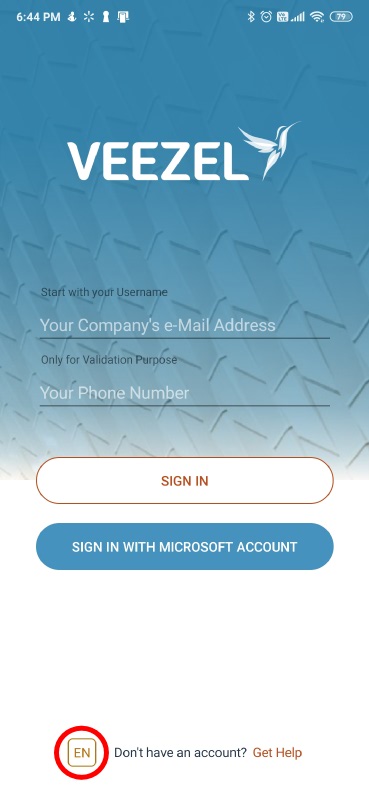
User can switch to any languages in the login view or by login-out and selecting the language. The demo image is displayed below:
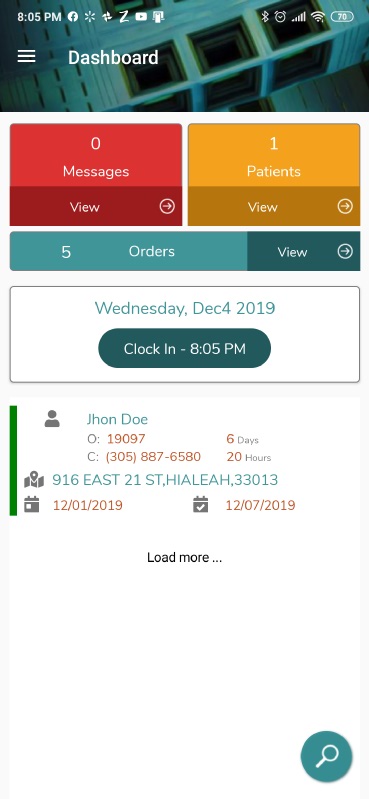
Dashboard are able to see some system stats on their dashboard page.
User can see the following contents on their dashboard:
The following image shows the basic Dashboard:
This option is shown according to the company's policies, if the company does not require it, it is not shown in the dashboard. Embedded section in the dashboard is given below:
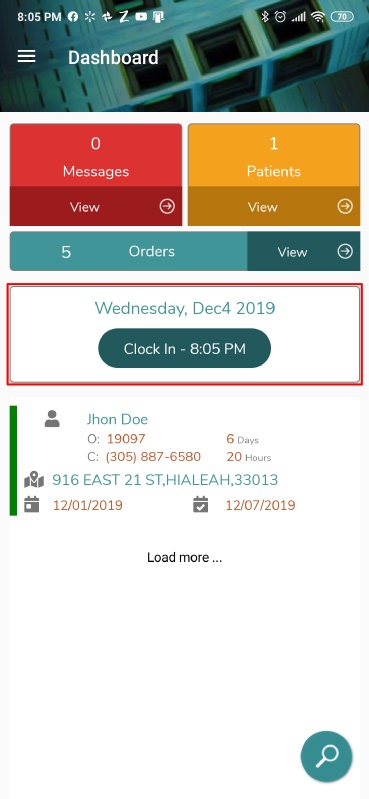
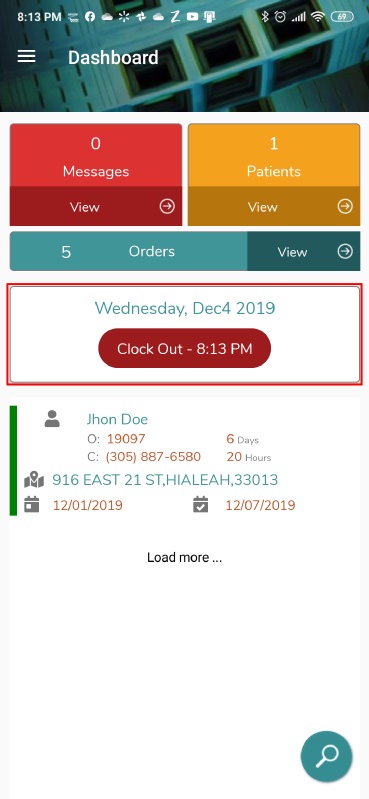
This option is shown according to the company's policies, if the company does not require it, it is not shown in the dashboard. Embedded section in the dashboard is given below:
Pending... . The form for adding new customer is displayed below.

The list view represent the list of all customers. Customers can be filtered by their status and are searchable by almost all attributes (e-mail, DOB, phone, etc..)

Users can view the profile of a customer by selecting specific customer on the list. This will open this view which is displayed when is selected.

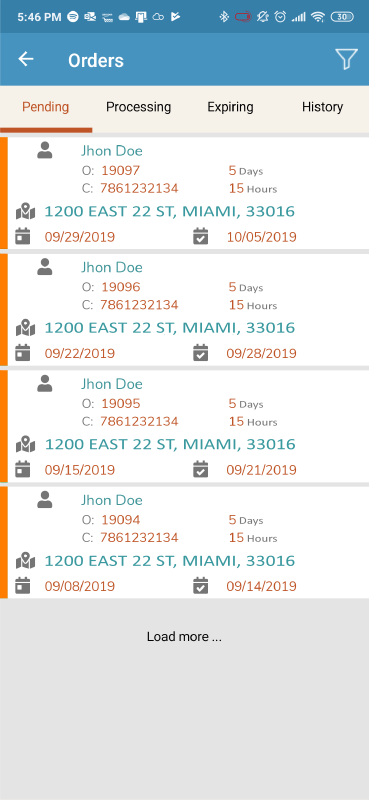
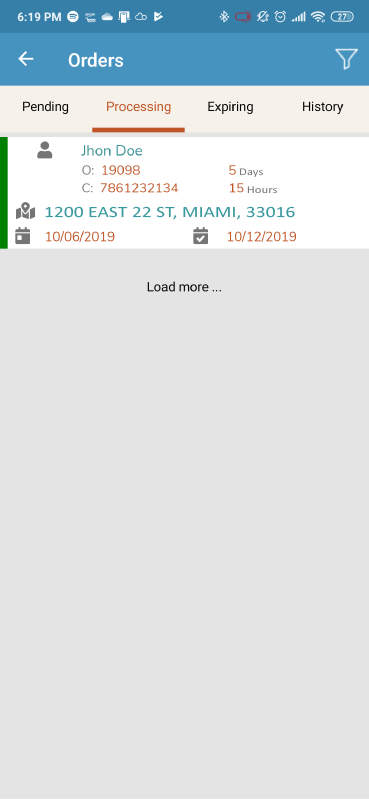
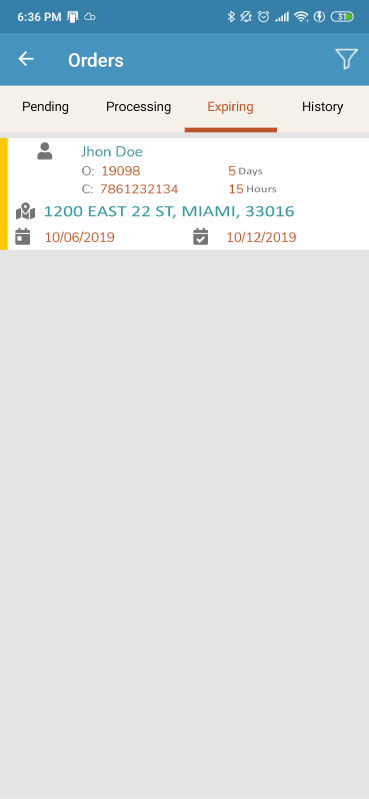
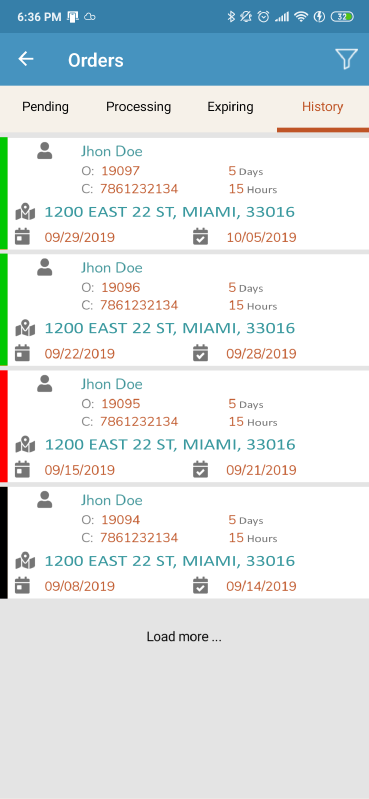
Users can view a specific order list by selecting the order status tab. The list also shows the relevant order information. The options can be displayed by changing to the left of the order. The view with the order lists is shown below:
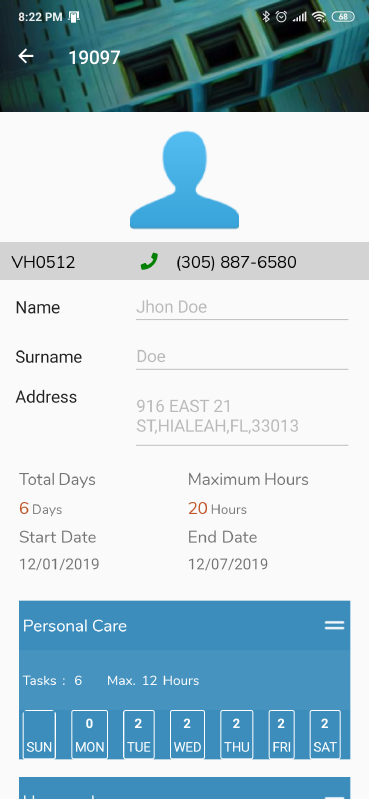
In the detail of the Order, all assigned task are listed and to complete the activities, select the day of the week in the task to be completed and the actions to be performed is showed. Form for order details and editing existing tasks, is provided below:

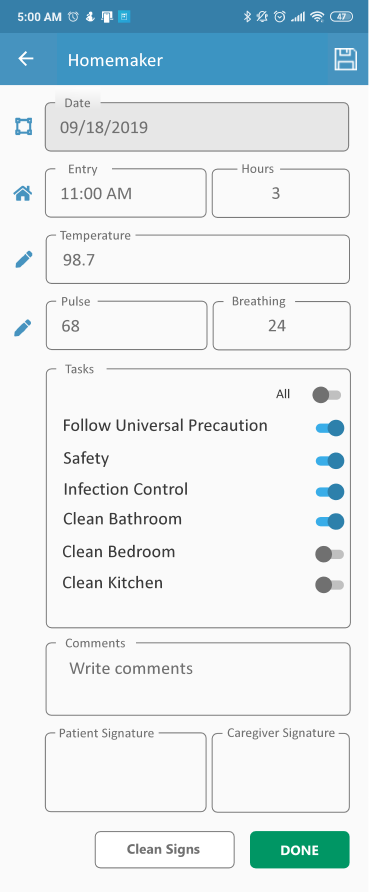
Form to complete tasks is given below:
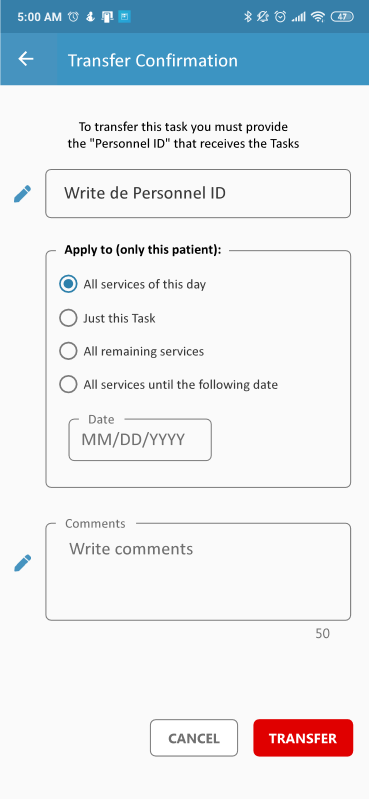
Form to transfer order is given below:
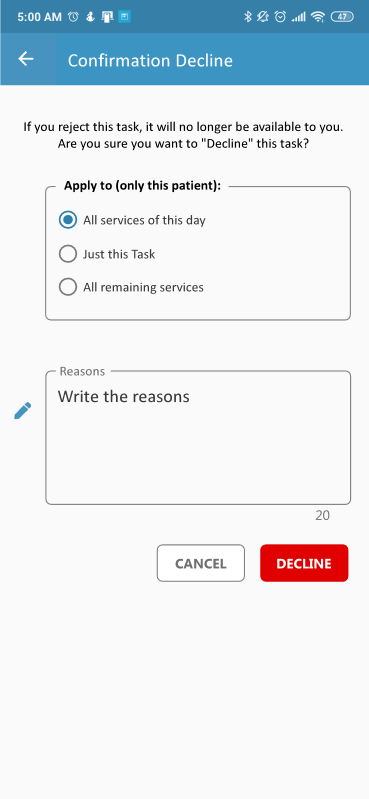
Form to decline order is given below:
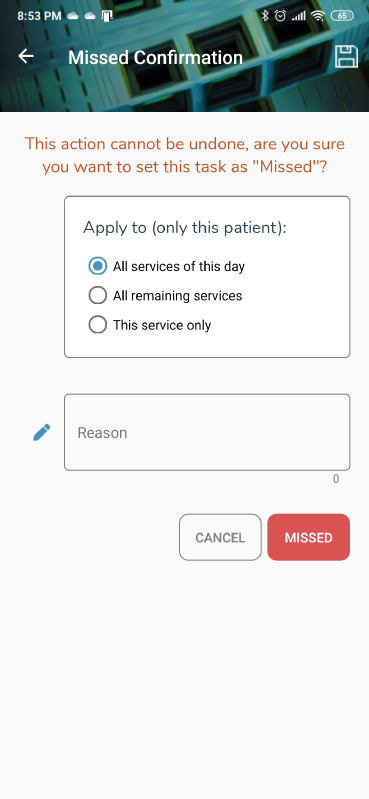
Form for unfulfilled order is given below:
Communication between users is easy, Users can communicate with each other by sending or receiving messages. Either from customers or internally in the company.
Messages can be send to single user or in response to an action, just by selecting the subject from the message list. Form for sending new message is given below:

User are able to see messages they received in the following form:

Shaded messages indicates that the message is unread.
Users can view the messages sent to others in the following form:

Message history depends on the status of the action. Users can view messages history in the following form:

In this form if the hide button is clicked, the message will be removed from the list.
To view the message details, click the subject of message from the list. Form to see the detail message is as follows:

How do I get notified of new messeges?
When you receive a new message, a new received message indicator will appear in the main menu.
How can I see my patients?
The Home page shows the patients assigned to it, you can see the detail of each patient in Patients by selecting View.
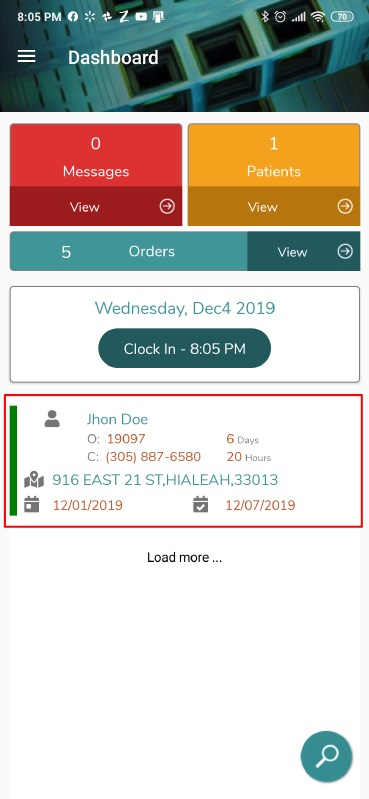
How can I see an order for the current week?
The home page shows at the bottom, the orders of the current week.
How to complete an order?
Select the order you wish to complete, select the service, day of the week and press the COMPLETE button. Enter the values of vital signs and complete the necessary information, then press the DONE button.
How to transfer an order?
Select the order you want to transfer, press the TRANSFER button, enter the ID of the person who will receive the order, select and complete the necessary data, press the TRANSFER button.
How to decline an order?
Select the order you want to reject, press the DECLINE button, select and complete the necessary information, press the DECLINE button. We will take care of assigning that rejected order to another Assistant.
How to make an order missed / lost?
Select the order you lost, press the MISSED button, complete the necessary information, press the MISSED button.
Thank you for using our software solution. If you have any questions that are beyond the scope of this help file, please feel free to email via our contact form here.
Amiware Inc. is a Software Solutions Architect, our focus is to provide business centric software solutions , integrate custom software and upgrade existing ones to make it easier to use and more efficient , and make your expirience as user friendly as you expect to be.
Veezel Suite is our solution for:
For more information visit Veezel Suite and Amiware Inc.